The Google browser is one of the most widely-used around the world and on all platforms. Here we will see how to install it and uninstall it on Android.
To install Chrome on Android there are two options: from our website or from Google Play. Uninstalling is a bit trickier. We will explain it all below.
Installing Chrome
Keep in mind that in many modern phones Chrome comes pre-installed, which means that it may update to a more recent version instead of being installed from scratch (there are exceptions, which we will look at). Whether you have an old handset or not, you will have to do the following. First, tap the green Download button which appears at the end of this guide.
It will take us here. Tap on Download again:
The download will be stored on the phone. The browser will save the APK file, by default, in the handset’s downloads folder. What happens when the download is complete will depend on the browser you are using. In most cases a notification will appear, while in others (such as My Browser) the APK may open directly.
If we have never installed an application from unknown sources onto our device, the phone will inform us that we need to give the browser permission for installing apps from unknown sources (these permissions are given for specific applications and not for the whole phone). To do this, tap Settings:
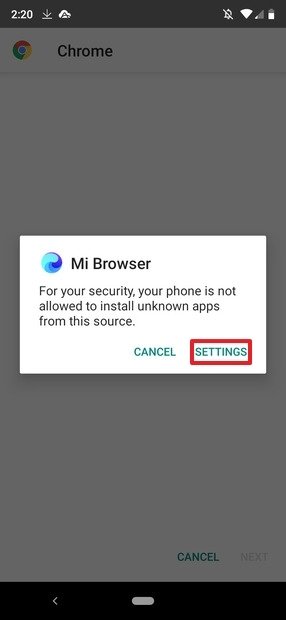
Enable unknown sources in Mi Browser
It will take us to the next screen. First, check the option Allow from this source, which is now in grey:
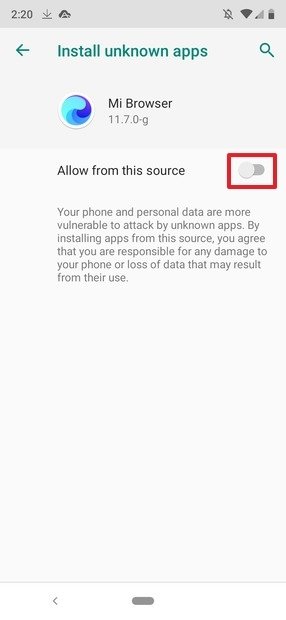
Unknown sources disabled
If we tap it, it will turn dark green:
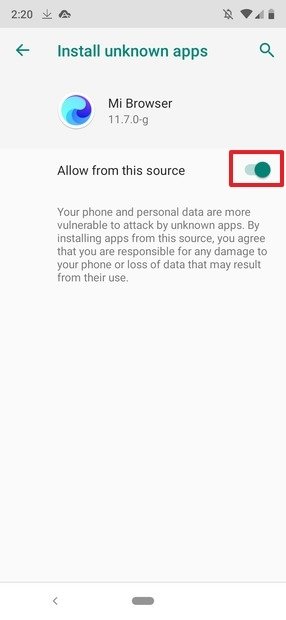
Unknown sources enabled
Now we tap on the arrow in the top-left corner of the screen in order to go back to the pack installer:
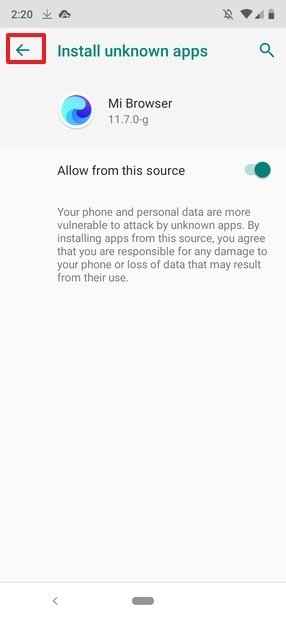
Go back to the package installer
This is when the actual installation process begins. Tap Install to install the app:
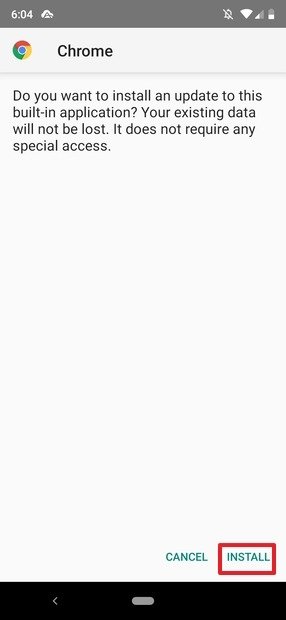
Install the APK
We will be able to view the application’s installation process. When it is completed, we will see the following message on the screen:
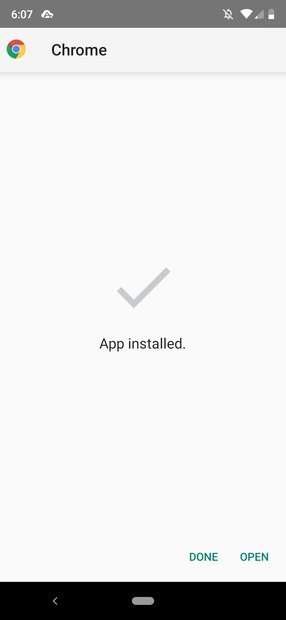
Chrome installed
Now Chrome has been installed onto our phone.
Installing Chrome from Google Play
Open Google Play and, in the search bar, type Chrome and tap on your keyboard’s magnifying glass (the button varies depending on the keyboard you use):
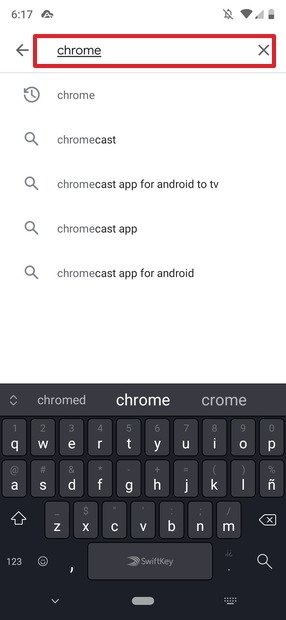
Search for Chrome in Google Play
Once again, the result we are interested in is the first one because it is the stable version:
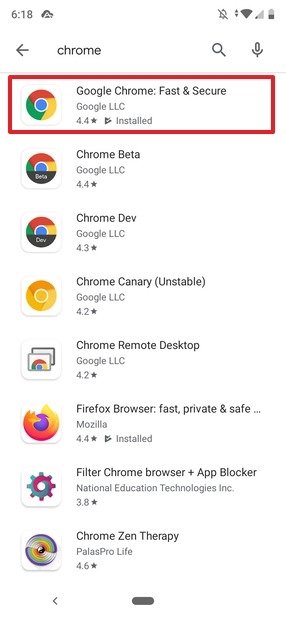
Results for Chrome in Google Play
If we don’t have Chrome pre-installed, we will have to tap the Install button (if it were already installed we would almost certainly see a button saying Update):
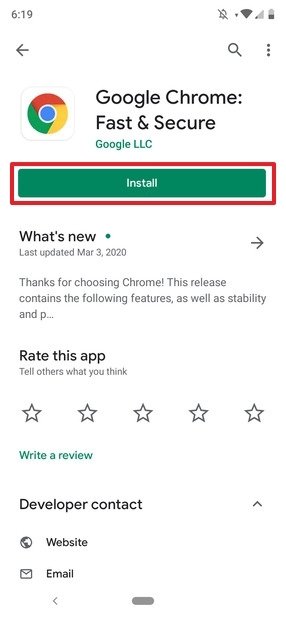
Installing Chrome from Google Play
The installation process will start. When it is complete, we will see the following on the screen:
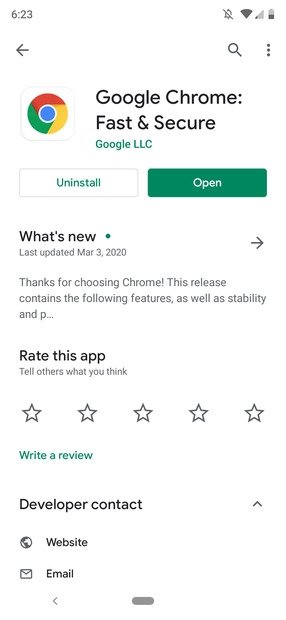
Chrome installed by means of Google Play
How to uninstall Chrome for Android
Chrome for Android is bit trickier when it comes to uninstalling. Given that it is a pre-installed application within the Google Apps or GAPPS pack, the operating system will nearly always assume that it belongs to its core native application pack, meaning that it cannot be uninstalled using conventional methods:
In fact, Google Chrome can only be completely uninstalled if the following applies:
- Your Android version is earlier than 5.0, with a customization layer that did not come pre-installed.
- You have a rooted phone and can use some kind of special app (such as Root Uninstaller) to delete it.
- You have a customized ROM installed, such as LineageOS, as opposed to the pre-installed ROM and that you haven’t installed it as a part of the GAPPS pack (meaning that Android won’t assume that Chrome is a core system application).
It is highly unlikely that all of these circumstances will exist at once: there are very few old phones, and it is increasingly difficult to find reasons for rooting a handset or installing a ROM to replace that which is pre-installed. In addition to all that, explaining how to root an Android device would take as many texts as there are (or have been) phones on the market: each one involves a different method, unique to the model, the manufacturer and the year it came out.
So, what to do? There are two options available. The first involves opening Android settings from the screen of your handset (or from the app drawer, or from the notifications tab, all three work):
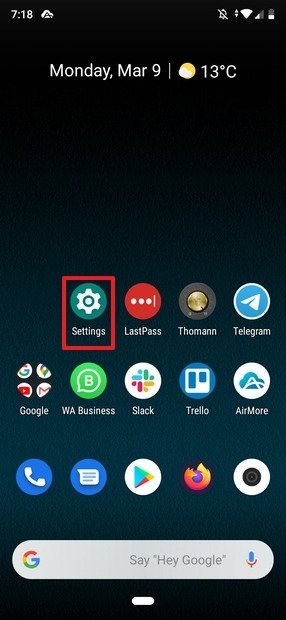
Open the settings
In settings, go to Apps & notifications:
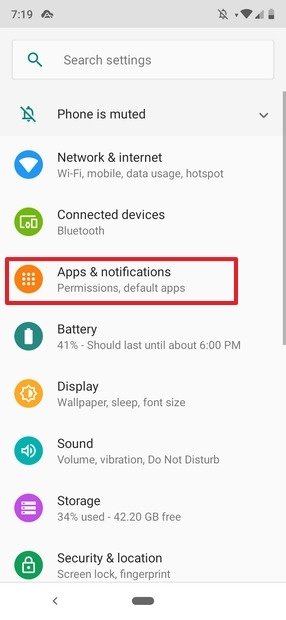
Applications and notifications
Then tap See all X apps:
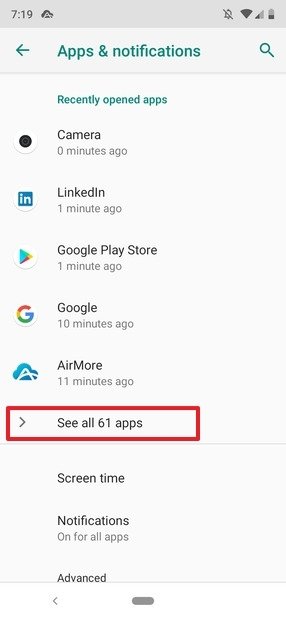
All the applications
Go into Chrome:
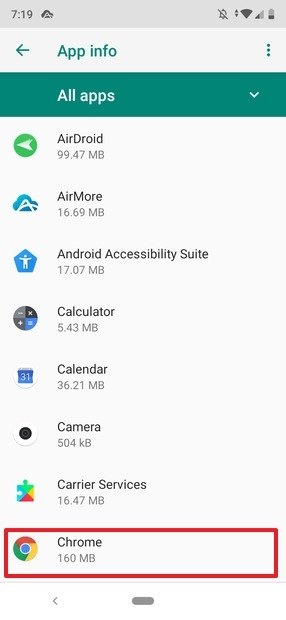
List of apps
In the app data page, tap Disable:
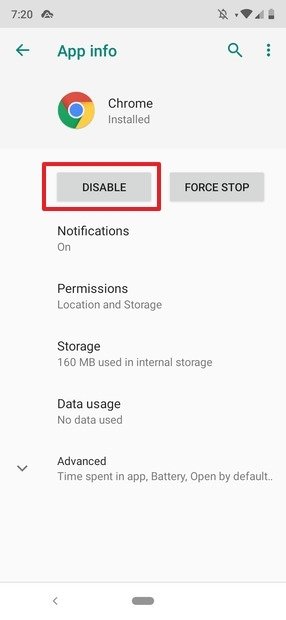
Chrome’s list
A message will appear informing you that if you disable the application it will no longer work on your device. Tap on Disable app:
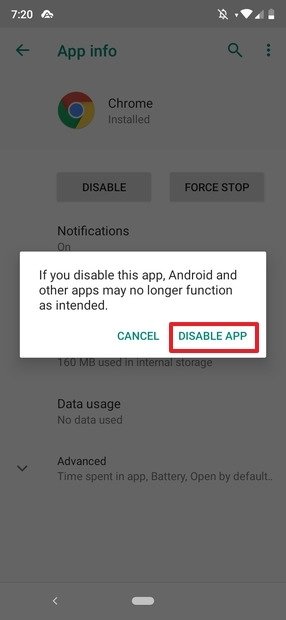
Disable Chrome
Now you should see a screen button with the word Enable, which can be used to re-enable the application:
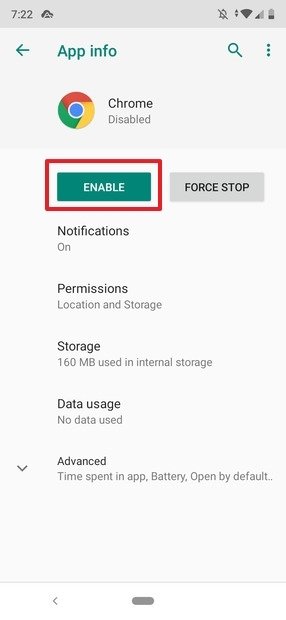
Chrome disabled
This means Chrome will no longer appear in your list of applications, even though you won’t have uninstalled it and it will continue to take up storage space.
If you follow this method, Chrome will be updated to the last available version at the moment it was disabled (which means it will take up even more space). The best way of making sure that the application takes up as little space as possible is to uninstall all of the updates before it was disabled, and this is where the second method comes into play.
We go back to the Google Chrome page in Google Play, and this time we tap the Uninstall button:
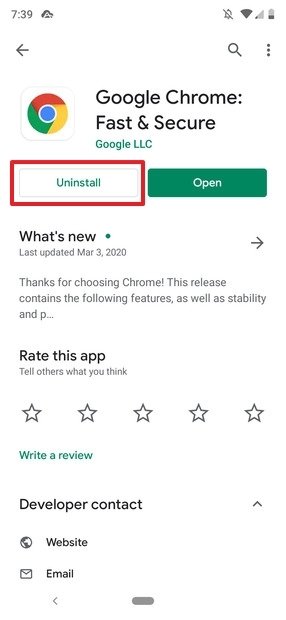
Uninstall Chrome updates
A message will appear informing us that we are about to uninstall all of the updates for a system application. We tap OK:
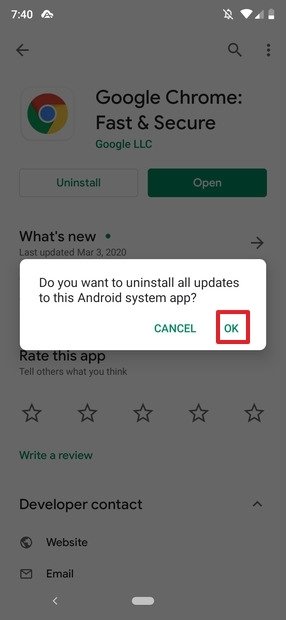
Confirm the uninstallation
Now we go back to the main page and repeat the process that we have already seen for disabling an application. Completely uninstalling it, as we have seen, is only possible in very, very specific circumstances.